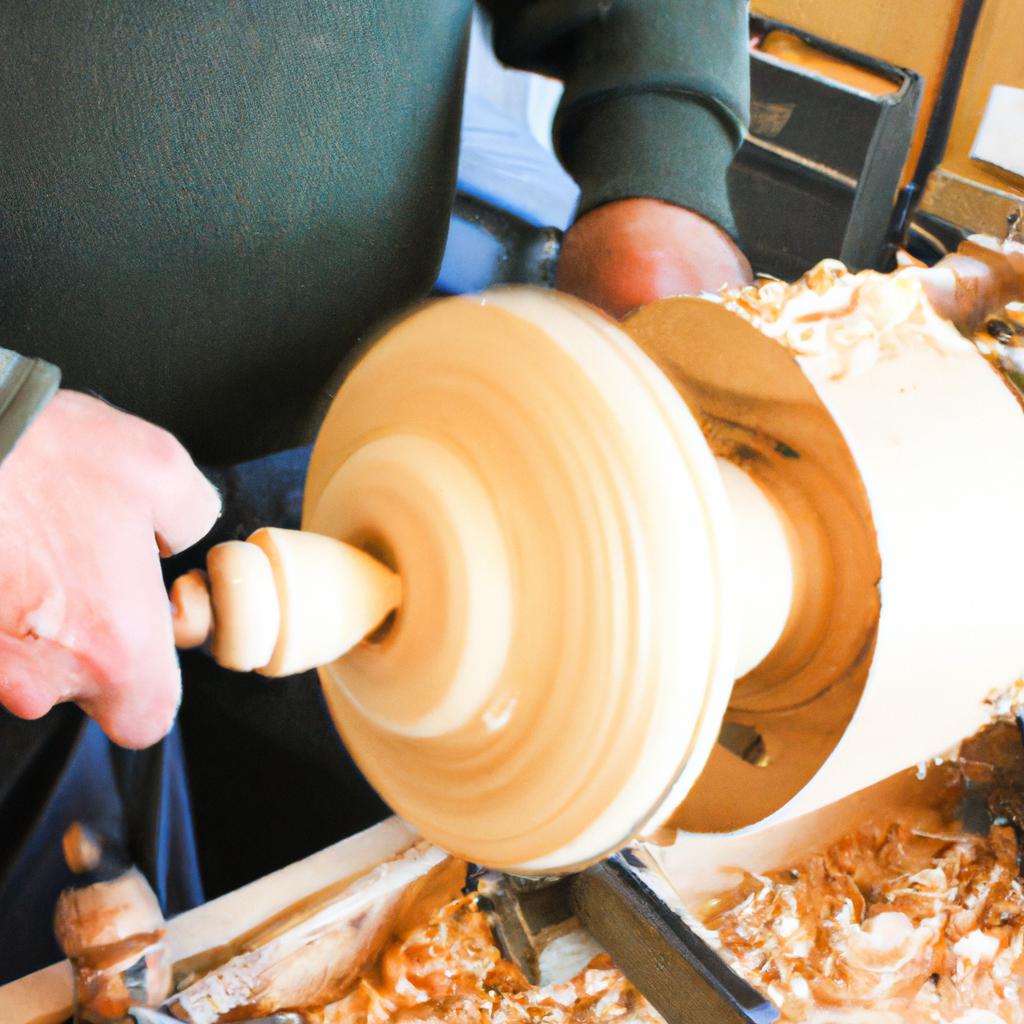
Woodturning is a centuries-old craft that involves shaping and carving wood using a lathe machine. This art form has gained immense popularity due to its ability to transform plain blocks of wood into exquisite wooden wonders. For instance, imagine a simple piece of oak transformed into an intricately designed bowl with delicate patterns and smooth curves. Woodturning requires not only technical skill but also artistic vision, precision, and patience.
The mastery of woodturning lies in the careful selection of materials, understanding their unique properties, and utilizing various techniques to bring out the natural beauty hidden within. From spindle turning to faceplate turning, each method offers distinct possibilities for creating functional and decorative objects such as bowls, vases, pens, or even intricate sculptures. The process begins by mounting the chosen piece onto the lathe and spinning it at high speeds while carefully guiding sharp tools against it. With steady hands and keen attention to detail, skilled artisans can shape the wood into desired forms that showcase both aesthetics and functionality.
Moreover, woodturning goes beyond mere craftsmanship; it allows individuals to connect with nature through this tactile experience. As one immerses oneself in the rhythmic motions of cutting away layers of wood to reveal its inner beauty, a sense of tranquility wash es over the woodturner. The aroma of freshly cut wood fills the air, and the smooth texture of the finished piece provides a tactile connection to nature’s wonders.
Woodturning also offers a creative outlet for self-expression. Artists can experiment with different types of wood, exploring their unique grain patterns and colors to create one-of-a-kind masterpieces. From rich mahogany to light maple, each type of wood presents its own set of challenges and rewards, allowing artists to push their boundaries and refine their skills.
In addition to personal satisfaction, woodturning can also be a source of income or a means of preserving traditional craftsmanship. Many artisans sell their creations at craft fairs or online platforms, attracting customers who appreciate the beauty and uniqueness of handmade wooden pieces.
To embark on this journey, one must acquire essential tools such as chisels, gouges, and scrapers that are specially designed for woodturning. It is important to learn proper techniques for using these tools safely in order to prevent accidents and achieve desired results.
Whether you are a novice or an experienced craftsman, woodturning offers endless possibilities for creativity and self-expression. With dedication and practice, anyone can unlock the artistry hidden within a simple block of wood and transform it into a timeless work of art.
Choosing the right wood for your turning project
Woodturning: Mastering the Art of Crafting Exquisite Wooden Wonders
When embarking on a woodturning project, one of the key decisions to make is selecting the appropriate type of wood. The choice of wood can greatly impact the final outcome, influencing both the aesthetics and functionality of the turned object. To illustrate this point, consider a hypothetical scenario where an artisan decides to create a decorative bowl using two different types of woods – oak and mahogany.
Factors to Consider:
To ensure success in woodworking projects, it is essential to carefully evaluate various factors when choosing suitable wood for turning. Here are some key considerations that should be taken into account:
-
Density: Different woods possess varying degrees of density, impacting their durability and resistance to wear over time. For instance, dense hardwoods like maple or ebony offer greater strength and longevity compared to softer varieties such as pine or cedar.
-
Grain Pattern: The grain pattern contributes significantly to the overall appearance of turned objects. Some individuals may prefer straight grains found in species like ash or birch, while others might gravitate towards more intricate patterns seen in burls or figured woods like tiger maple.
-
Workability: Woodworkability refers to how easily a particular type of wood can be shaped and carved during the turning process. Woods with favorable workability characteristics include cherry or walnut due to their smooth texture and consistent fiber structure.
-
Color and Figure: The color palette available in different woods enables artisans to showcase distinct hues ranging from light blondes to deep reds or rich browns. Additionally, unique figures such as spalting (dark lines caused by fungal growth) or bird’s eye (small circular spots resembling eyes) add captivating visual interest.
Benefits Oak Mahogany
Density Denser; better suited for functional items Lighter; primarily used for decorative purposes
Grain Pattern Prominent grain pattern with visible rays Straight grain pattern with minimal figure
Workability Easy to work with; suitable for beginners Requires more skill and experience due to interlocking grains
Color and Figure Warm golden-brown color; minimal figure Deep reddish-brown color; subtle figuring
Essential tools and equipment for woodturning:
Transitioning seamlessly into the next section, once you have chosen the right wood for your turning project, it is crucial to equip yourself with the necessary tools and equipment. These instruments will enable you to transform a plain block of wood into a stunning masterpiece.
Essential tools and equipment for woodturning
Woodturning is a captivating art form that allows craftsmen to transform blocks of wood into exquisite creations. In order to master this craft, it is crucial to have the right tools and equipment at your disposal. This section will guide you through the essential tools and equipment required for woodturning, providing insights on their functionality and importance.
Imagine you are working on a wooden bowl project. The first tool you would need is a lathe, which serves as the foundation of any woodturning endeavor. A lathe enables rotational movement of the piece being turned, allowing precise shaping and carving. Alongside the lathe, other key tools include gouges, parting tools, skew chisels, scrapers, and calipers. Each tool plays a unique role in creating different shapes and textures within your workpiece.
To ensure safety during the turning process, investing in protective gear such as face shields or goggles is imperative. These safeguard your eyes from flying debris that may result from cutting or sanding operations. Additionally, dust collection systems help maintain a clean workspace by removing airborne particles generated while working with wood.
In summary:
- Lathe: Provides rotational movement for shaping and carving.
- Gouges: Utilized for roughing out material and forming curves.
- Parting Tools: Used to create grooves or separate sections of the workpiece.
- Skew Chisels: Ideal for refining straight edges or achieving smooth finishes.
- Scrapers: Employed for smoothing surfaces and removing imperfections.
- Calipers: Aid in measuring dimensions accurately.
| Tool | Functionality |
|---|---|
| Lathe | Enables rotation of the workpiece |
| Gouges | Shapes and carves materials |
| Parting Tools | Creates grooves or separates sections |
| Skew Chisels | Refines edges or achieves polished finishes |
Safety gear and dust collection systems are essential for a clean, protected workspace. These tools and equipment form the foundation of woodturning, allowing you to delve into the art with confidence.
Transitioning from understanding the necessary tools and equipment, our next section will explore mastering basic woodturning techniques. By developing proficiency in these fundamental skills, you will be well-equipped to embark on more intricate projects and expand your creative boundaries.
Mastering basic woodturning techniques
Woodturning is a captivating art form that has been practiced for centuries, allowing craftsmen to transform blocks of wood into exquisite masterpieces. In the previous section, we explored the essential tools and equipment necessary for woodturning. Now, let us delve further into the realm of this art by exploring the mastery of basic woodturning techniques.
To better understand the importance of mastering these techniques, consider an example where a novice woodturner attempts to create a bowl without proper knowledge or skills. The result may be a rough and unbalanced piece with uneven walls and an unstable base. However, with proficiency in basic woodturning techniques, such as spindle turning and faceplate turning, one can achieve precision and symmetry in their creations.
Mastering these foundational techniques requires practice, patience, and attention to detail. Here are some key aspects to focus on during your journey towards becoming a skilled woodturner:
- Tool Control: Learning how to maneuver different cutting tools effectively is crucial in achieving smooth finishes and precise shapes.
- Understanding Wood Grain: Recognizing the direction of wood grain helps prevent tear-out and enables you to work harmoniously with the natural characteristics of each piece.
- Sharpening Skills: Keeping your tools sharp ensures clean cuts while minimizing fatigue and frustration.
- Finishing Techniques: Applying appropriate finishes enhances both the aesthetic appeal and durability of your turned wooden pieces.
In addition to these key aspects, it is also beneficial to expand your knowledge through studying various designs and engaging with other experienced woodturners. By observing their workmanship and seeking guidance when needed, you can accelerate your growth as an artist.
With a solid foundation in basic woodturning techniques established, you will be ready to explore more advanced methods in creating intricate designs. In our next section on “Creating intricate designs with advanced woodturning methods,” we will dive deeper into the world of woodturning craftsmanship beyond the basics covered here.
Creating intricate designs with advanced woodturning methods
Section H2: Creating intricate designs with advanced woodturning methods
Building upon the foundation of mastering basic woodturning techniques, this section delves into exploring the world of creating intricate designs through the utilization of advanced woodturning methods. By incorporating these techniques, you will be able to elevate your craftsmanship and produce stunning wooden wonders that captivate viewers.
To illustrate the potential of advanced woodturning methods, let’s consider a hypothetical example. Imagine crafting a delicate wooden vase adorned with intricate geometric patterns. Through meticulous planning and execution, you can transform a simple piece of timber into an exquisite work of art that showcases both skill and creativity.
When embarking on projects involving advanced woodturning techniques, it is essential to adhere to certain principles for optimal results:
- Precision: Attention to detail is paramount when working on complex designs. Ensure accurate measurements and precise cuts to achieve seamless transitions between different elements.
- Patience: Advanced woodturning requires patience since intricate designs often demand more time and effort. Embrace the process and take pleasure in watching your vision come to life gradually.
- Experimentation: Don’t shy away from trying new techniques or pushing boundaries. Embrace experimentation as it allows for personal growth and discovery within your craft.
- Adaptability: Being adaptable enables you to overcome challenges encountered during the creation process. Adjustments may be necessary along the way, so remain open-minded and flexible.
Elevating your expertise in advanced woodturning methods opens up a realm of possibilities for expressing your artistic flair. Whether it involves carving elaborate shapes or combining different materials seamlessly, the satisfaction derived from transforming raw materials into breathtaking pieces remains unparalleled.
In our subsequent section about “Finishing touches: Sanding and applying a flawless finish,” we will explore how attention to detail extends beyond design intricacies by focusing on perfecting surface textures and achieving impeccable finishes. Transition smoothly into this topic by emphasizing the importance of completing each project holistically, ensuring that every aspect receives the same level of dedication and finesse.
Finishing touches: Sanding and applying a flawless finish
Imagine you have just completed an intricate design using advanced woodturning methods, bringing out the inherent beauty of the wooden material. Now comes the crucial step of refining your creation to achieve a flawless finish that truly showcases your craftsmanship. With meticulous attention to detail, this section will guide you through the process of sanding and applying finishing touches.
To illustrate these techniques, let’s consider the hypothetical example of a wooden bowl crafted from a piece of richly grained walnut. This elegant bowl features delicate fluting along its rim, requiring precise execution to highlight its unique character. By employing expert sanding techniques and carefully selecting appropriate finishes, you can enhance the natural appeal of the walnut while ensuring durability.
To achieve that perfect finish on your woodturnings, follow these essential steps:
- Begin by using coarse-grit sandpaper (around 80 or 100) to remove any rough surfaces or imperfections.
- Gradually progress to finer grits (such as 180, 220, and even up to 400) for smoothing out scratches and achieving a smooth surface.
- Consider incorporating wet sanding in your routine for an exceptionally polished result.
- Finally, apply multiple coats of high-quality finish such as lacquer or oil-based varnish to protect the wood and bring out its luster.
Emphasizing the significance of proper sanding techniques and impeccable finishes cannot be overstated when it comes to producing exceptional woodturned pieces. To further emphasize their importance, let us explore some benefits associated with careful sanding and finishing:
| Benefits |
|---|
| Enhances grain patterns |
| Provides protection against moisture damage |
| Boosts visual appeal |
| Adds durability |
By investing time in meticulous sanding practices and skillful application of suitable finishes, not only do you elevate the aesthetic allure of your creations but also ensure their longevity. The next section will delve into valuable tips for maintaining and preserving these wooden masterpieces, allowing you to enjoy the fruits of your labor for years to come.
Now that you have mastered the techniques of achieving precision and control in woodturning, let’s explore some essential tips for maintaining and preserving your wooden masterpieces.
Tips for maintaining and preserving your wooden masterpieces
Section H2: Tips for maintaining and preserving your wooden masterpieces
Transitioning from the previous section on finishing touches, let us now delve into essential tips for maintaining and preserving your exquisite wooden creations. Imagine this scenario: you have just completed a stunning handcrafted wooden bowl, meticulously sanded to perfection and finished with a flawless coat of varnish. Now, how do you ensure its longevity and keep it in pristine condition? Here are some invaluable guidelines to help you preserve the beauty of your wooden masterpieces:
-
Regular Cleaning:
- Use a soft cloth or brush to remove dust and dirt.
- Avoid using harsh chemicals that can damage the wood’s finish.
- Gently wipe spills immediately to prevent staining.
-
Humidity Control:
- Maintain consistent humidity levels (around 40-50%) to prevent warping or cracking.
- Consider using a humidifier during dry seasons or in arid climates.
- During high-humidity periods, use dehumidifiers or fans to reduce moisture content.
-
Protective Measures:
- Utilize coasters or trivets under hot dishes or beverages to prevent heat marks.
- Place felt pads on the bottom of furniture legs to protect against scratches.
- Cover wooden pieces when not in use to shield them from excessive sunlight exposure.
-
Periodic Maintenance:
| Task | Frequency | Tools/Materials Required |
|---|---|---|
| Inspect for Damage | Every 6 months | Magnifying glass, flashlight |
| Reapply Finish | As needed (every year) | Sandpaper, varnish/finish product |
| Oil/Wax Treatment | Twice per year | Linseed oil/beeswax, clean cloth/paper |
Incorporating these maintenance practices will not only extend the lifespan of your wooden wonders but also ensure that they continue to captivate with their timeless beauty. By dedicating a little time and attention, you can preserve the intricate grain patterns, vibrant colors, and lustrous finishes of your creations for years to come.
Remember, proper maintenance is crucial in safeguarding the integrity of your wooden masterpieces. Embrace these practices as an ongoing commitment to preserving not only the aesthetic appeal but also the value inherent in each piece. Your dedication will be rewarded with heirloom-quality pieces that can be treasured by generations to come.
Comments are closed.