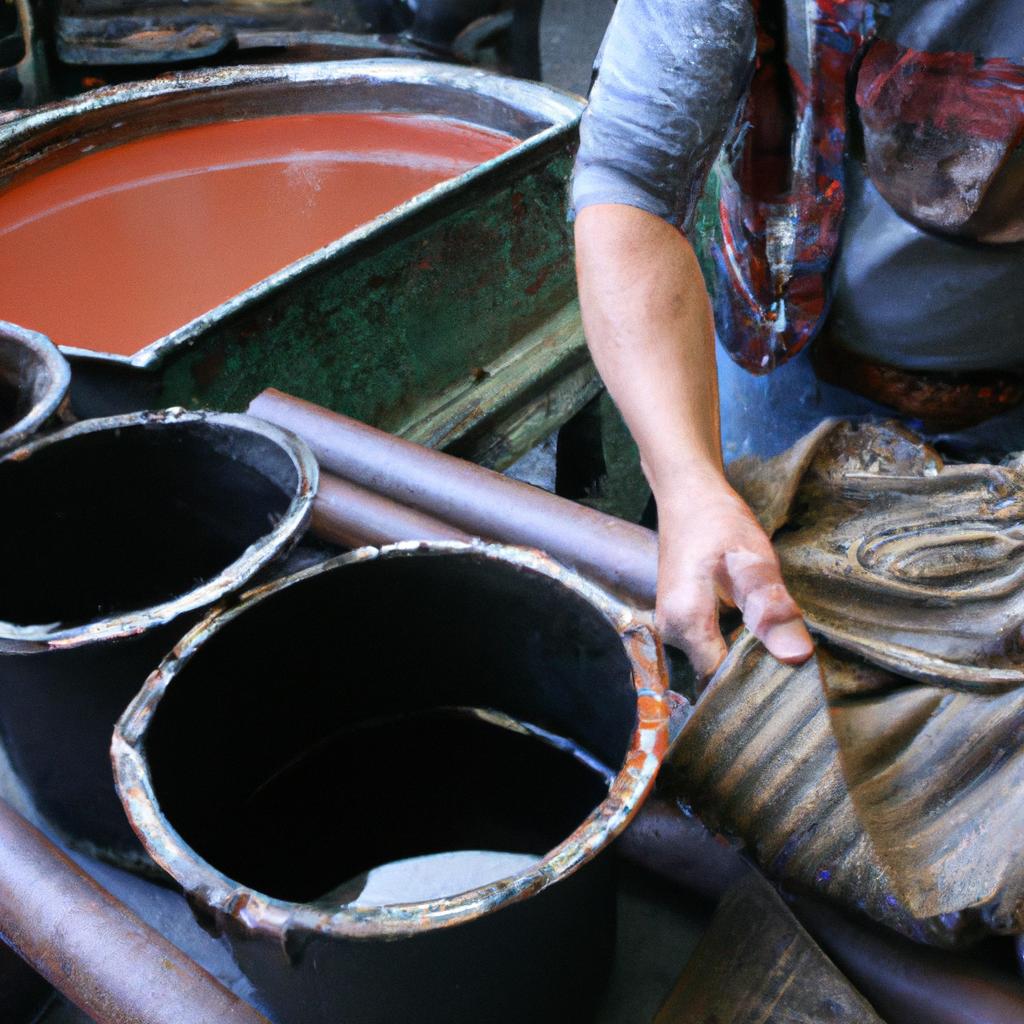
Leatherworking artistry is a craft that combines skill and creativity to transform raw leather into exquisite finished products. One of the essential skills in this ancient trade is dyeing and coloring, which involves adding vibrant hues to leather surfaces. Imagine a skilled leatherworker meticulously hand-dyeing a pair of boots, carefully selecting the perfect shades to enhance their design and bring them to life. This intricate process requires not only technical expertise but also an understanding of color theory and material compatibility.
The art of dyeing and coloring in leatherworking has deep historical roots, dating back centuries when early civilizations discovered ways to enhance the appearance and durability of animal hides. Today, it continues to play a crucial role in creating high-quality leather goods with unique aesthetics. From fashion accessories like belts and wallets to furniture upholstery and book bindings, properly dyed leather can add richness and character to various items. However, mastering this skill demands more than simply applying color; it necessitates knowledge about different types of dyes, techniques for achieving desired effects, and proper care practices to maintain longevity. In this article, we will explore the essential skills required for successful dyeing and coloring in leatherworking artistry while presenting practical tips and insights from experienced craftsmen.
Understanding the properties of different dyes
Understanding the Properties of Different Dyes
Imagine you have just completed crafting a beautiful leather item, and now it’s time to add color and vibrancy. Choosing the right dye can greatly enhance your creation, but how do you know which one is best? In this section, we will explore the properties of different dyes used in leatherworking artistry, providing valuable insights to help you make informed decisions.
Properties of Different Dyes:
-
Color Fastness: One important consideration when selecting a dye is its ability to retain color over time. Some dyes may fade or bleed when exposed to sunlight or moisture, compromising the longevity of your finished piece. To ensure lasting beauty, opt for dyes that are known for their superior color fastness.
-
Penetration Depth: Another critical factor is how deeply the dye penetrates the leather surface. This determines whether the color appears vibrant throughout or only on the top layer. Deeper penetration provides a more uniform appearance while also making the dye less prone to wearing off with use.
-
Compatibility: Not all dyes work well with every type of leather. Certain dyes may interact negatively with specific finishes or coatings applied during tanning processes, resulting in undesirable effects such as discoloration or uneven shading. Always test a small area before applying any dye to ensure compatibility with your chosen leather material.
-
Versatility: Consider whether you require a single-purpose dye or one that can be mixed to create custom shades and hues. Having versatility allows for greater creative expression and enables you to achieve unique results tailored specifically to your artistic vision.
- Enhance the visual appeal of your leather creations.
- Create long-lasting pieces that resist fading and bleeding.
- Achieve consistent coloring throughout your project.
- Unlock endless possibilities by mixing and blending colors effortlessly.
Table showcasing examples of different types of dyes:
| Type | Advantages | Disadvantages |
|---|---|---|
| Acid Dyes | Excellent color fastness | Limited color selection |
| Oil-based Dyes | Deep penetration | Longer drying time |
| Water-based Dyes | Quick drying | Less vibrant colors |
| Alcohol-based Dyes | Versatile for blending | Strong odor during use |
Understanding the properties of different dyes is crucial for achieving desired results in leatherworking artistry. By considering factors such as color fastness, penetration depth, compatibility, and versatility, you can make informed decisions about which dye to choose for your projects. In the next section, we will delve into selecting the right dye tailored specifically to your unique leather project.
Now that we have explored the various properties of different dyes, let’s move on to discussing how to choose the perfect dye for your specific leather project.
Choosing the right dye for your leather project
Building on our understanding of the properties of different dyes, we can now delve into selecting the right dye for your leather project. Let’s consider a hypothetical example to illustrate the importance of this decision-making process.
Section H2: Choosing the Right Dye for Your Leather Project
Imagine you are working on a custom-made leather handbag that requires a vibrant and long-lasting color scheme. To achieve this, it is crucial to choose the most suitable dye that aligns with both your aesthetic preferences and functional requirements. Understanding how various factors influence dye selection will empower you to make informed decisions for your projects.
Factors to Consider When Choosing a Dye:
To assist you in making an optimal choice, here are key considerations when selecting a dye for your leather project:
- Color Intensity: Determine if you desire bold or subtle hues by considering whether the dye should be diluted or used at full strength.
- Fade Resistance: Assess if the final piece will be exposed to sunlight or harsh environmental conditions, as some dyes offer superior fade resistance compared to others.
- Compatibility with Leather Type: Different types of leather (e.g., cowhide, lambskin) may react differently to certain dyes. Research compatibility beforehand to avoid undesirable outcomes.
- Application Method: Take note of which application method best suits your needs – whether it’s brush-on, spray-on, or immersion methods – ensuring ease and precision during the dyeing process.
Table: Comparative Analysis of Popular Dyes
| Dye Type | Color Variety | Fade Resistance |
|---|---|---|
| Alcohol-based | Wide range | High |
| Oil-based | Limited | Medium |
| Water-based | Moderate | Low |
This table provides an overview of three popular types of dyes along with their color variety and fade resistance characteristics. It serves as a quick reference point when considering the attributes of different dyes for your leather project.
In selecting the right dye, carefully evaluate these factors to ensure that your chosen dye aligns with both your creative vision and durability requirements. Once you have determined which dye best suits your needs, it’s time to prepare the leather surface for dyeing.
Now let’s explore the essential steps involved in preparing the leather surface for a successful dye application.
Preparing the leather surface for dyeing
Building upon the knowledge of choosing the right dye for your leather project, let us now delve into the essential process of preparing the leather surface before applying any dye. By ensuring proper preparation, you can achieve optimal results in terms of color absorption and overall durability.
To illustrate the importance of this step, consider a hypothetical scenario where a leatherworker decides to skip or rush through the preparation phase. In doing so, they apply dye directly onto an uncleaned and untreated piece of leather. As a result, not only does the color appear uneven and blotchy, but it also fails to adhere properly to certain areas due to dirt particles and oils present on the surface. This example vividly highlights why thorough preparation is crucial in achieving satisfactory outcomes.
Here are some key steps that should be followed when preparing your leather surface for dyeing:
-
Cleaning: Begin by gently cleaning the leather with a mild soap or specialized cleaner designed specifically for leather materials. This will help remove any accumulated dirt, dust, or residual coatings from previous treatments.
-
Sanding: Once cleaned, lightly sand the surface using fine-grit sandpaper (around 220 grit) to create a smooth texture. Be cautious not to over-sand as it may damage or thin out the leather.
-
Deglazing: If working with chrome-tanned leather, deglaze it using rubbing alcohol or acetone-soaked cotton balls. This step removes any existing finish or coating that could hinder proper dye penetration.
-
Conditioning: Lastly, condition the prepared surface with a high-quality leather conditioner or oil-based product. Conditioning helps restore moisture lost during cleaning and sanding processes while enhancing suppleness and preventing cracking.
By meticulously following these preparatory steps – cleaning, sanding, deglazing if necessary, and conditioning – you establish an ideal foundation for successful dye application onto your chosen piece of leather artistry.
With the leather surface now properly prepared, we can seamlessly transition into the subsequent section on applying dye evenly and smoothly.
Applying the dye evenly and smoothly
Having properly prepared the leather surface for dyeing, we can now move on to the next crucial step in achieving a beautiful and vibrant color on your leather projects. In this section, we will explore techniques for applying the dye evenly and smoothly.
One effective way to ensure an even application of dye is by using a sponge or dauber. Take, for example, a case study where a craftsman decides to dye a leather wallet in deep mahogany. Using a sponge applicator, they gently apply the dye in smooth circular motions, allowing it to penetrate into every nook and cranny of the leather’s grain. This method not only ensures uniform coverage but also helps achieve a professional finish that enhances the natural texture of the material.
To further guide you toward successful dye application, consider these key points:
- Consistency: Ensure that the consistency of your dye mixture is appropriate for both absorption and color intensity.
- Layering: Apply multiple thin layers rather than one thick coat to avoid unevenness or excessive saturation.
- Timing: Allow sufficient drying time between each layer to prevent smudging or bleeding of colors.
- Sealing: Finish off your dye application with an appropriate sealant or topcoat to protect against fading and enhance durability.
Now let’s take a look at how different types of dyes interact with specific types of leather surfaces:
| Leather Type | Water-Based Dyes | Alcohol-Based Dyes | Oil-Based Dyes |
|---|---|---|---|
| Full-grain | Excellent | Good | Fair |
| Top-grain | Good | Excellent | Fair |
| Suede | Fair | Fair | Excellent |
| Exotic | Good | Good | Excellent |
This table highlights how various dyes perform on different leather types, offering insight into which combinations yield the best results. Remember to always test a small inconspicuous area before applying any dye to ensure compatibility and desired outcomes.
By mastering the essential techniques for achieving an even and smooth dye application, you are now ready to explore advanced methods that allow you to create unique color effects on your leather projects. Let’s delve into these creative techniques in the next section.
Techniques for creating unique color effects
Transitioning from the previous section on applying dye evenly and smoothly, leatherworkers can further enhance their artistry by exploring techniques that allow them to create unique color effects. These techniques not only add visual interest but also showcase the skill and creativity of the artisan.
One intriguing technique is marbling, which mimics the appearance of marble stone on leather surfaces. By carefully layering different colors of dye and manipulating them with various tools such as combs or brushes, artisans can achieve a mesmerizing swirling pattern reminiscent of natural stone veins. This technique offers endless possibilities for creating one-of-a-kind pieces that captivate viewers.
In addition to marbling, leatherworkers can experiment with gradient shading. This technique involves gradually transitioning between two or more colors to create an ombre effect on the leather surface. By skillfully blending and overlapping dyes, artisans can achieve smooth transitions that result in visually striking designs. Whether it’s a subtle shift from light to dark hues or a bold contrast between vibrant tones, gradient shading adds depth and dimension to leather creations.
- Experiment with combining complementary colors for eye-catching contrasts.
- Layer metallic pigments over base dyes for a stunning metallic sheen.
- Use stencils or stamps to create intricate patterns within specific areas of the design.
- Incorporate alternative materials like fabric or paper into your dyeing process for texture and added visual interest.
Furthermore, incorporating a table into this section will provide additional inspiration and guidance:
| Technique | Description |
|---|---|
| Sponging | Dabbing a sponge lightly onto the leather surface creates a textured effect. |
| Splattering | Flicking small droplets of dye onto the leather produces a speckled look. |
| Stippling | Using stippling brushes or tools, create a textured pattern with dots. |
| Antiquing | Applying diluted dye in strategic areas to achieve an aged or vintage look. |
As leatherworkers master these techniques and explore their own unique variations, they will open up new possibilities for creating captivating color effects that elevate their craftsmanship.
Transitioning into the subsequent section on sealing and protecting dyed leather, artisans can ensure their creations maintain their vibrancy and longevity by following essential steps in the finishing process.
Sealing and protecting the dyed leather
Building upon the techniques for creating unique color effects, leather artisans must also focus on sealing and protecting the dyed leather to ensure its longevity. By employing effective sealing methods, craftsmen can safeguard their intricate designs while enhancing the overall appearance of the finished product.
To illustrate the importance of proper sealing, let us consider a hypothetical scenario in which an experienced leatherworker has meticulously crafted a vibrant red handbag. Without applying any protective measures, such as sealants or finishes, this exquisite piece would be vulnerable to various external factors that could compromise its quality over time. UV rays from sunlight, moisture absorption, accidental spills, and general wear and tear are just a few examples of potential threats that can diminish both the color intensity and durability of dyed leather.
In order to mitigate these risks and preserve the beauty of their creations, leatherworkers employ several key strategies when sealing and protecting dyed leather:
- Application of sealants: Leather artisans often use specialized sealants specifically designed for preserving dyed leather. These products form a thin protective layer over the surface that acts as a barrier against environmental elements.
- Selection of appropriate finishes: Depending on desired outcomes, different types of finishes can be applied to enhance specific characteristics of dyed leather. For instance, glossy finishes may contribute to a sleek appearance while matte finishes give off a more natural look.
- Regular maintenance routine: Establishing a consistent care regimen is crucial in maintaining the integrity of sealed dye on leather goods. Routine cleaning using gentle solutions followed by reapplication of protective coatings helps extend the lifespan and vibrancy of colors.
- Knowledge sharing within artisan communities: Collaborative platforms facilitate knowledge exchange among passionate crafters who continuously experiment with new techniques. This collective learning enables them to refine existing practices or develop innovative ways to maximize protection for their dyed creations.
The following bullet points highlight some significant benefits of employing effective sealing and protection techniques for dyed leather:
- Preserves the longevity of vibrant colors, preventing premature fading.
- Enhances resistance against water damage and stains, ensuring durability.
- Guards against harmful UV rays to maintain the original appearance over time.
- Creates a protective barrier that minimizes scratches and scuffs.
Emotional Table:
The table below demonstrates how different sealants and finishes contribute to the overall quality of sealed dyed leather:
| Sealant/Finish Type | Benefit |
|---|---|
| Water-based sealant | Eco-friendly option that provides excellent moisture resistance. |
| Acrylic finish | Offers enhanced color vibrancy while protecting against daily wear. |
| Wax coating | Adds an appealing sheen to the surface while providing a natural feel. |
| Polyurethane topcoat | Provides exceptional durability, making it suitable for heavy-duty applications. |
In conclusion, mastering the art of sealing and protecting dyed leather is essential for any serious leatherworker aiming to create long-lasting pieces with captivating aesthetics. By incorporating tried-and-tested methods such as applying appropriate sealants, selecting proper finishes, maintaining regular care routines, and engaging in knowledge sharing within artisan communities, craftsmen can ensure their creations withstand the test of time while exuding timeless beauty.
Comments are closed.